It’s been nearly 3 years since HP launched and then quickly discontinued the HP TouchPad. But the 9.7 inch tablet continues to live on thanks to the efforts of independent developers.
Hackers have been installing new builds of Android on the tablet for ages, and while the road has sometimes been bumpy, these days the aging TouchPad is probably better with Android than it ever was with webOS.
Unfortunately installing Android on the TouchPad has always been a somewhat complicated process. Recently things got a lot simpler.
Developer JC Sullins has released a tool called TouchPad Toolbox, or TPToolbox which replaces older tools and lets you install Android with just a few button presses. And that’s not all it can do.

You can use TPToolbox to resize your device partitions or repair partitions. And unlike ACMEInstaller (the original tool for installing Android on the TouchPad), TPToolbox erases webOS entirely.
This gives you more space for your Android operating system, apps, and files. You can still re-install webOS, but you’ll need to use TouchPad Toolbox again to make some changes and then downloadwebOS Doctor to restore your tablet to factory settings.
If you’re already running Android on your HP TouchPad, TPToolbox provides the simplest way to resize your storage partitions so you can install data media builds of Android (which includes most recent custom ROMs based on Android 4.4 KitKat).
How to install Android with TouchPad Toolbox
Note that TouchPad Toolbox is designed to run from a Windows PC or Mac with a TouchPad tablet plugged in via USB cable, although the Linux instructions might work for Mac as well.
I used a Windows PC for testing purposes, so this guide assumes you’re also using a Windows computer. If you have a Mac or Linux machine, check out the xda-developers forum for tips.
Also note that TPToolbox will wipe all the data from your device and rewrite your boot menu… so make sure to backup any data you need before proceeding. And if anything goes wrong, you’re on your own for finding a solution.
With that in mind, here are some tips for using TPToolbox to install Android on an HP TouchPad for the first time or to install a newer version of Android. The whole process should take less than 20 minutes (I made a few cuts in the video above so you wouldn’t have to watch the boot logo for 3 minutes on first boot, among other things).
1. Make sure you have Java installed
Download the latest version of Java and make sure it’s installed.
2. Install Novacom driver
Once you’re sure that Java is installed, download the Universal Novacom Installer .jar file from Google Cloud and click to run.

Follow the instructions and it should install Novacom on your system.
3. Download TouchPad Toolbox
Grab the latest version of TouchPad Toolbox using the links from the xda-developers forum. Unzip the files to a folder on your computer.
There should be 3 files, a .bin file, a .bat file for Windows, and an .sh file for Linux and Mac.
Technically we’re all set to run TouchPad Toolbox now, but if you use it to modify your device you might end up with a tablet that doesn’t do anything. So let’s take a detour and download the operating system files.
4. Download an Android ROM, recovery, and gApps file
You need three things to get the full Android experience. A recovery lets you flash software updates and make other changes. The Android ROM is basically the operating system. And the gApps package includes the Google Play Store and other Google apps such as Gmail, YouTube, and Google Maps.
There are a number of versions of each that you can use. JC Sullins has download links for a few custom recoveries (I’m using TWRP because it’s the one I’m most familiar with, but CWM also works), but you’re kind of on your own for finding compatible ROMs and gApps packages.
Here are a few to get you started. JC Sullins (the same guy who created TPToolbox) created a pretty good build in April, and you can find details and download links at xda-developers.
I’m using a nightly build of CyanogenMod 11 from June 3rd, 2014 for this test. developer invisiblek has links to the latest versions in a different xda-developers forum thread. Or you can just grab the download straight from Dev-Host.
I’m also using invisiblek’s gApps package from Dev-Host.
At launch, TPToolbox supports recent builds of CM11 (CyanogenMod), AOKP (Android Open Kang Project), and EV (Evervolv) for “tenderloin,” which is the code-name for the HP TouchPad. As usual, there are more details at xda-developers.
Anyway, once you have your ROM, recovery, and gApps files downloaded, save them to a folder on your PC. Do not unzip them.
5. Reboot your TouchPad into webOS recovery
Now you’re ready to really get started. Plug your tablet into your PC with a USB cable and then reboot into recovery:
Android users: Most Android ROMs let you press and hold the power button and until a power menu pops up. Choose the reboot option and when you get to a black screen with blue text, choose the option for webOS recovery. A big USB icon should appear on your screen.
webOS users: If this is your first time installing Android and you’re currently running webOS, power down the tablet completely. Then press and hold the VolumeUp and Power button simultaneously until you see the big USB icon.
6. On your PC, double-click the tptb_v40_win.bat file
If you’re using a Linux or mac machine, you’d use the .sh file instead.
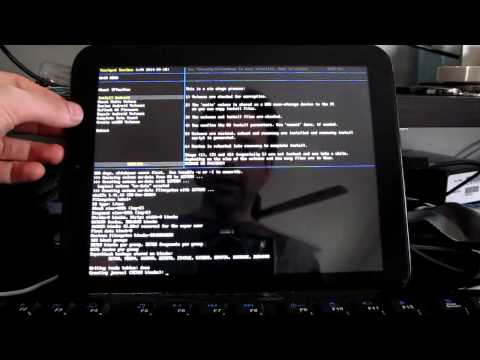
Now you should see a lot of white text fly by on your TouchPad screen. When it’s done, you’ll see the TouchPad Toolbox user interface.

7. Complete Data Reset
Now for the scary and awesome part. We’re about to wipe any and all operating systems currently installed and change the partition scheme. Don’t worry: even though we’re removing webOS, we’re not removing the webOS recovery — that means you can always run TPToolbox again if you need to.
From this screen, use the volume keys to change the highlighted item until you get to “Complete Data Reset.”
Hit the Home button to select it. You’ll be asked a few times if this is really what you want to do. Keep hitting Home to select… unless you’ve changed your mind.
8. Install Android
When you see the “Done” message, use the volume buttons to get to the “Install Android” option and hit the Home button to start the process.
This will automatically mount your tablet as a USB mass storage device so you can copy the ROM, recovery, and gApps files you downloaded in step 4 into the folder called “ttinstall.”
Once you’re finished copying files, just select the option on your TouchPad to “unmount media volume” and the install process will continue.
TPToolbox will verify the files, ask you if you want to confirm, and then get started.
Once it’s installed your recovery your tablet will reboot into recovery so it can load the ROM and gApps package… and then it should load CyangoenMod, AOKP, Evervolv, or whatever other version of Android you’re using.
Enjoy
That’s it… now you can login with your Google account, connect to WiFi, and enjoy your Android tablet.
Future versions of TPToolbox may have additional features including the ability to re-install webOS without a webOS Doctor.
You may also eventually be able to permanently install TouchPad Toolbox on your tablet so that you can access it from the boot menu without first plugging your tablet into a PC. This could let you resize and repair partitions, create webOS volumes, or make other changes without a PC.

How to use TouchPad Toolbox to install Android, erase webOS on the HP TouchPad
 Reviewed by Anonymous
on
June 04, 2014
Rating:
Reviewed by Anonymous
on
June 04, 2014
Rating:
Reviewed by Anonymous
on
June 04, 2014
Rating:
No comments: