Nexus 6 Tips and Tricks
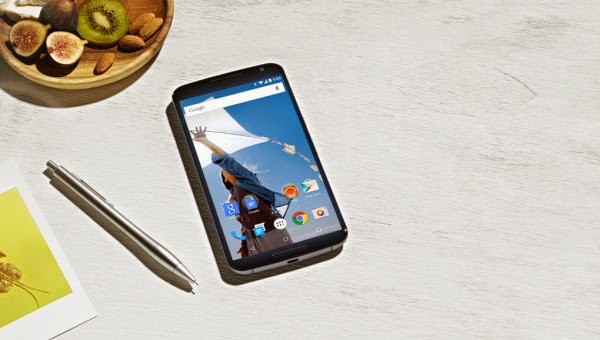
But before talking Nexus 6 tips and tricks, let’s have a look at the hardware platform that is underpinning the handset co-developed by Google and Motorola. It measures 159.3 x 83 x 10.1 mm and weighs in at 184 grams, while being splash resistant. The main selling point of the Nexus 6 is most likely the 6-inch AMOLED display with an impressive resolution of 1440 x 2560 pixels and a pixel resolution of 493 ppi.
The processing tasks are handled by a Qualcomm Snapdragon 805 chipset based on four Krait 450 cores clocked at 2.7 GHz and an Adreno 420 GPU. The technical specifications list also includes 3 GB of RAM, 32 or 64 GB of internal storage, 13 MP primary camera with optical image stabilization, dual LED-flash, and 4K video recording support, a 2 MP user-facing camera, and a massive 3,220 mAh battery. In terms of connectivity, it arrives with LTE, WiFi ac, Bluetooth 4.1 Low Energy, NFC, and microUSB 2.0. As you may know already, Nexus 6 is the first smartphone in the world to come pre-loaded with Android 5.0 Lollipop.
Tap & Go
Once you get the Nexus 6 out of its box, the first thing you will need to do is set it up. Because it’s running Android 5.0 Lollipop, you will be able to use Tap & Go do set it up.
The set up process is now easier than ever and if you are coming from a device that’s NFC enabled it’s even easier. All you need to do is tap them back-to-back to sync your Google account info, settings, data, wallpapers, apps, and get your Nexus 6 ready to go.
Guest Mode and Screen Pinning
Without a doubt there will be loads of personal information and sensitive on your Nexus 6, but you will be able to keep it away from people who user your phone when you aren’t nearby. Android 5.0 Lollipop has introduced Screen Pining and multi-user support for phones.
Screen Pinning is a new feature that allows the user to “pin” a specific app so the person using your Nexus 6 can’t do anything else. Screen Pinning can be turned on in Settings > Security > Screen pinning, then you can choose what app to pin from the Recent (multitasking) menu. If you want to leave the pinned app, you will have to press the back and recents buttons simultaneously.
If you plan on sharing your Nexus 6 with somebody else, you can also enable Guest Mode. It works just like multi-user works for tablets, and it can be enabled from the Quick Settings menu.
Numbers Row for Google Keyboard
Nexus 6 has a massive display, so you will be able to take advantage of all that extra screen. Since you have “so much room for activities” you will be able to tweak the Google Keyboard.
When the Google Keyboard is visible go to Settings by long-pressing the comma key next to space bar, then select Google Keyboard Settings. Go to Appearance & Layouts, the to Custom input styles. Use the “+” button and add choose a language, then in the layout drop-down menu choose “PC.” Now go to “Language” options, then deactivate “Use system language” and choose the recently enabled PC layout.
Battery Saver
As I was mentioning above, Nexus 6 is kept alive by a 3,220 mAh battery and even though it’s capable of providing decent battery life, some of you might want bigger autonomy. Android 5.0 Lollipop introduced a new feature called Battery Saver which would allow you to, well, save battery.
Battery saver is reducing the performance of your Nexus 6, turns off vibrations and animations and restricts background data. You can instruct the device to automatically turn on battery saver when your battery is at 15% or 5% in Settings > Battery then tapping the menu button. When battery saver mode is on, the status and nav bars turn orange.
Check Data Usage
Android 5.0 Lollipop has arrived with a revamped Quick Settings area that it’s now more useful. You will be able to quick check data usage in Quick Settings.
You can go to Quick Settings by either pulling with two fingers from the top of the screen, or pull down the Notifications bar, then pull down once more. To see check data usage all you need to do is tap on the data connection toggle. You will also be able to view warnings and data limits and go to the Data Usage menu by tapping the “More settings” button.
Set Your Account Photo
I was telling you above that Android 5.0 Lollipop has brought multi-user support for phones. You should be able to notice a generic profile icon in the upper right of the lock screen and when the notifications bar is pulled down.
How can you change your account phone? Well, it’s fairly easy. Open Quick Settings, tap on the profile icon in the upper right corner, then choose More Settings. Once you are in the Users & profiles menu, tap on your user then change your profile photo from the drop-down menu.
App Notifications
Lollipop introduces lock screen support for notifications, but it also allows you hide sensitive information or block notifications entirely. You can choose privacy and priority settings for each app, individually.
You can control notifications from either Settings > Sound & Notification > App notifications or you can long tap on a lock screen notification then press the info button that appears on the right. You can choose to Block notifications for a certain app, to set their Priority (show notifications at the top of the list), or hide Sensitive content from a notification.
Smart Lock
If you are using any screen lock method you know that it’s quite annoying some times and it can slow you down. Since Nexus 6 is running Lollipop you will be able to use the “Smart Lock” feature.
Using Smart Lock, you will be able to tell your Nexus 6 when it’s safe to remove the lock screen security. It can be disabled when your phone is connected to a Bluetooth or NFC device, when you are in a Trusted Place of your choice. Google also tweaked “Face Unlock” with a new feature called Trusted Face. You can find all these options in Settings > Security > Smart Lock.
Lock Screen Shortcuts
You will also be able to access certain apps more quickly on your Nexus 6. Google has implemented a couple of shortcuts in the lockscreen.
You should be able to notice two icons in the lower left and right corners of the lock screen. If you swipe left from the camera shortcut will open the camera app and if you swipe right from phone shortcut you will be able to quickly launch the Phone app.
Record 4K Videos
Nexus 6 is one of the many Android smartphones capable of recording 4K videos. For some of you, the 4K video recording option may not be enabled as default.
To enable 4K video recording open the default Google Camera app, swipe from the left side to open the menu, then tap on the settings icon. Go to Resolution & Quality where you can chose UHD 4K resolution for the Back camera video.
Turn On High Quality Audio
Besides arriving with a beautiful Quad HD screen that it’s idea for watching videos, Nexus 6 is also capable of providing great audio quality. It has dual-front speakers and you will be able to enable surround sound audio.
In the Play Movies and TV app pull out the menu from the left and go to “Settings.” Scroll down and check the “Enable surround sound” option.
OK Google Command When Nexus 6 Is Locked
Nexus 6 has support for voice commands and you can use the “OK Google” hotword even though the device is locked. This will allow you to search Google, play some music, or do other stuff without even touching your phone.
To activate this feature you have to open Google Now, swipe from the left to pull out the menu, go to Settings, tap on “Voice” and go to “OK Google Detection.” Here is where you will have to enable “Always on” and “When locked”, but before that you must record your voice model.
Turn Off Merged Tabs
Besides a revamped card-based Recents menu, Android 5.0 Lollipop also introduced a document-centered multitasking. This means that apps like Chrome are capable of displaying a different card for each opened tab. Even though this feature sounds useful, you will notice that the Recents screen becomes quite crowded when you have lots of Chrome tabs opened.
Fortunately, the Merged Tabs feature can be disabled. Open Chrome, go to Settings (tap on the menu button in the upper right corner). Tap on Merge tabs and apps and turn off this feature here.
Nexus 6 Tips and Tricks
 Reviewed by Anonymous
on
December 16, 2014
Rating:
Reviewed by Anonymous
on
December 16, 2014
Rating:
Reviewed by Anonymous
on
December 16, 2014
Rating:


No comments: